Lady Rain has been making her own tempeh for years because she knows that the freshly made kind is irresistible! This guide will show you how to make your own tempeh starter and also provide recipes and tips for how to incorporate this versatile meat substitute into your cooking.
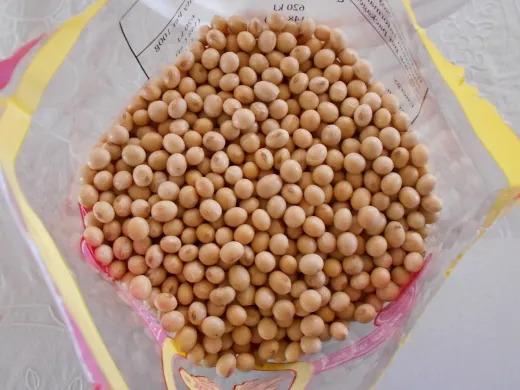
Tempeh is made from fermented soybeans. It originated in Indonesia, where soy is a staple source of protein for the people and where the consumption of meat is considered a luxury. It is a popular vegan food as a substitute for meat and is gluten-free.
The production of tempeh involves soaking soybeans for several hours and cooking them before letting them ferment. Fermentation is complete within 48 hours when the soybeans are bound together by layers of white mycelium from a species of white fungus called Rhizopus oligosporus. The solid mass of tempeh can then be cut into slices or chunks and added as an ingredient for other recipes.
This guide will show you how to make your own tempeh starter, as well as provide recipes for how to work this versatile meat substitute into your cooking.
It is a fermentation starter for fermenting soybeans and binding them into a cake. Basically, the tempeh starter contains spores of Rhizopus oligosporus and some rice flour—it is very easy to make. It costs almost next to nothing to make, other than paying for a packet of commercially made tempeh, plus your time and effort.
So, you will need to buy a small packet of tempeh to make more of it. It is similar to making homemade yogurt—if you want to make yogurt, you need to buy a small tub of it with live culture as a starter.
If you do not live in Indonesia, finding the tempeh starter can be quite difficult. Although starters can be ordered online, they often come at a rather costly price. If you have never made tempeh before and just want to experiment with making it, however, you won’t want to buy a packet of starters good enough to make 10 kilograms of tempeh. And you don’t even know if you are going to end up with something edible or an epic fail!
Luckily, you can find packets of tempeh in the refrigerated or frozen section of most Asian stores and some supermarkets. I would give the supermarkets a miss because they tend to stock marinated tempeh. We need plain tempeh to make the starter.
A packet of store-bought tempeh should have traces of spores that are invisible to the naked eye. A milky white tempeh will have a lower spore count as compared to one that has tiny black dots on it. So, if you are after some spores, try to choose one that looks a little “dirty” or has traces of black dots. If you can’t find one with black spores, you can make the white tempeh “mature” and sporulate (grow spores).
Note: Avoid tempeh that shows signs of any other colors. They are probably not fresh.
Some commercially produced tempehs might have been subjected to heat to kill off the fungus and prevent them from sporulating. Look for a different supplier if the previous batch of tempeh does not produce any black spores after incubating.
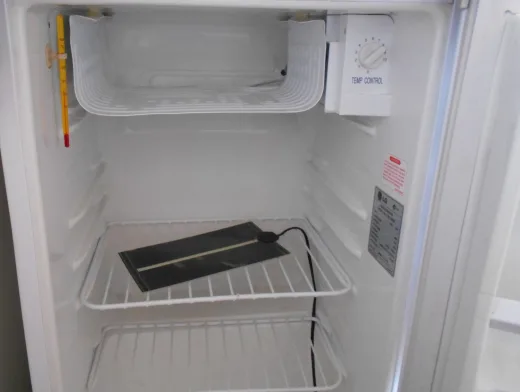
If you live in a cold or cool temperate area below 25° C, an incubator is a must for making tempeh—otherwise, you will never be able to produce a successful batch. When you are ready to make the starter, you will, at the very least, need to improvise an incubator. Your homemade incubator must be able to maintain a temperature of 32° C. Test the incubator to see if it can provide a stable temperature for making tempeh later.
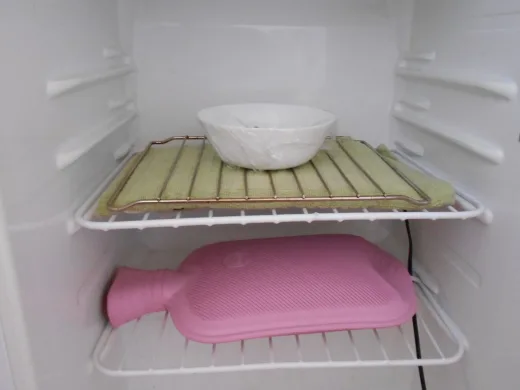
If you happen to have an old bar fridge or a big insulated container waiting to be discarded, don’t throw it out just yet. It is perfect for incubating tempeh because the thick, insulated walls minimize heat loss (especially in winter), and it does not require more than 10 W to operate.
My homemade incubator has a small 10 W heating mat (for pets), a hot water bottle, and an aquarium thermometer. The heating mat rests on a rack in the centre of the bar fridge and is covered with some tea towels and another metal rack over it. This prevents direct contact of the tempeh with the heating mat, which may cause overheating and uneven heat distribution.
The hot water bottle is placed at the bottom of the fridge, and the thermometer is at the top of the fridge. The heat from the hot water bottle at the bottom will rise and get distributed all over the fridge, and the temperature is recorded by the thermometer near the freezer at the top of the fridge.
Prep time: 36 hours 50 min
Cook time: 45 min
Ready in: 37 hours 35 min
Yields: 1 slab of tempeh, 4 servings
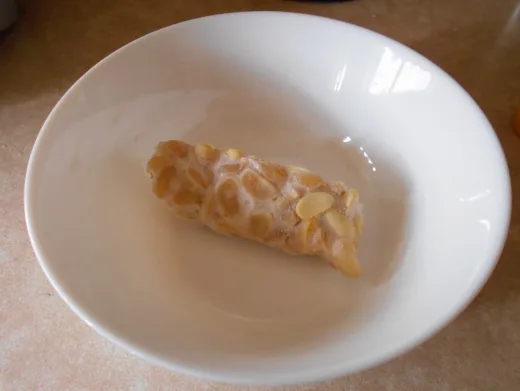
Cut out a chunk from your store-bought tempeh and eat the rest. Hopefully, this will be the last time you have to eat commercially manufactured tempeh! The small chunk will become the starter for all your homemade tempeh later.
Place the chunk in a small bowl and cover it with cling wrap. Pierce holes all over the cling, wrap it with a toothpick and place the bowl in the incubator for at least two days.
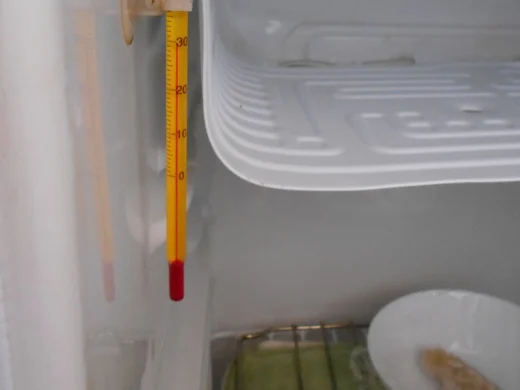
Check the temperature every five hours or so to be sure it does not go below 28° C or above 35° C. After 24 hours, you should be able to see some changes on the piece of tempeh. It will either have fluffy white mycelia growing on it, or it will have started to turn grey. If it is white and fluffy, the starter is not ready yet.
Note: If it turns slimy and smells foul, it is no good and should be discarded immediately. Start with another fresh chunk of tempeh that is, if you haven’t already eaten the remainder!

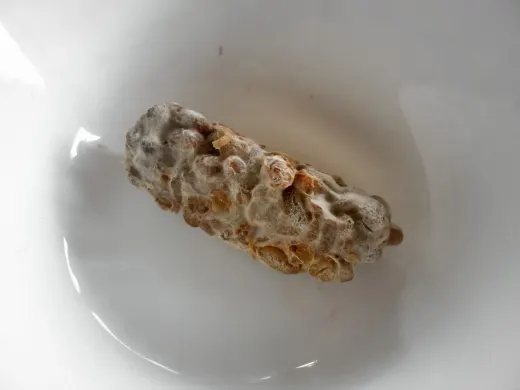
Leave it in the incubator until traces of black appear. Black means the culture has started to sporulate, producing the black spores we are after.
When there is enough grey or black stuff on the piece of tempeh, remove it from the incubator and cut it into thin slices or very small chunks. Leave the chunks to air dry for a couple of days. Blend the dry chunks with double the amount of rice flour until they are in powder form.
This will be your starter, and it is enough to make at least 10 batches of tempeh. The homemade tempeh starter needs to be stored in an airtight container in the fridge. It can stay in the fridge for about a week. For longer storage, put it in the freezer.
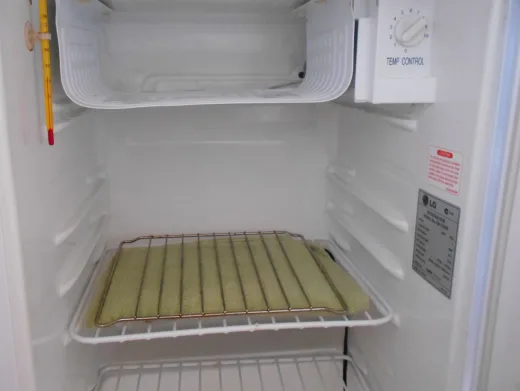
In the containers below, the starter on the left was made from a fresh piece of tempeh without visible black spores. Fermentation of tempeh with this starter tends to take longer as compared to fermenting with the black spores starter in the container on the right.
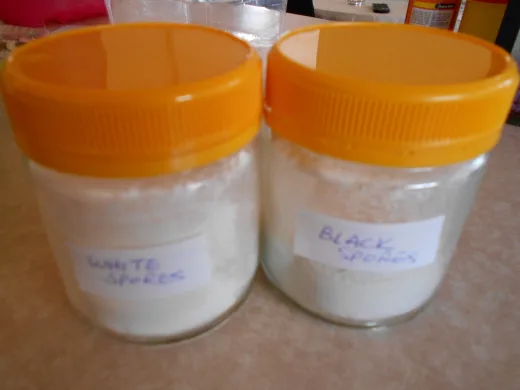
In conclusion, the spore count is definitely higher if there are black dots all over the tempeh. The more black dots in the starter, the better!
At last, you can start making some tempeh. Now that you have already made your own starter, making your own homemade tempeh will be a breeze, believe me!
Put the bowl in the incubator. Check the temperature every five to six hours. Some white stuff should be visible after 12 hours if the temperature is correct. Maintaining the temperature at around 32° C is very important—otherwise, the tempeh will not turn out well.
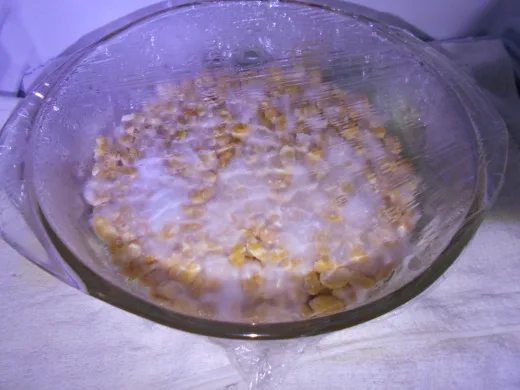
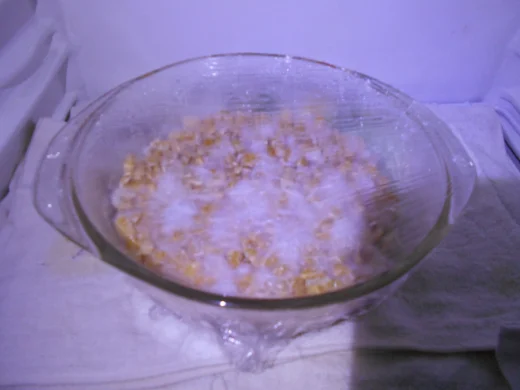
A white fluffy layer of mycelium will eventually cover the beans after around 30–36 hours. At this stage, black spores might start to appear in some areas. If not, leave the tempeh a little longer in the incubator.
The tempeh should not smell foul. If it does, discard it because it is not edible anymore. The fermentation normally does not take more than two days, and the mycelium should be distributed all over the beans.
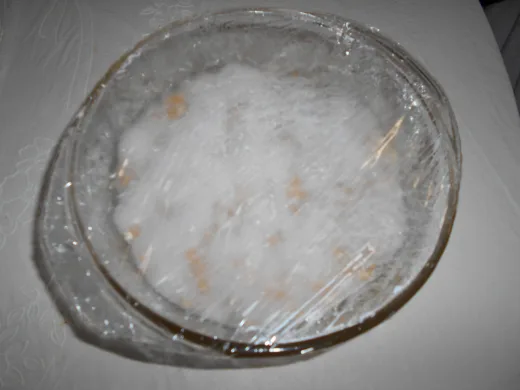
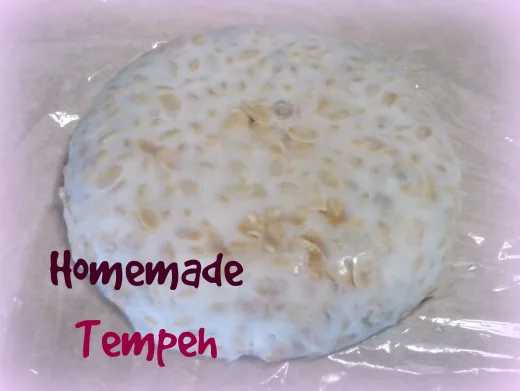
When the soybeans are all covered with white mycelium, remove the tempeh from the incubator. It can then be used for cooking right away—freshly made tempeh is irresistible!
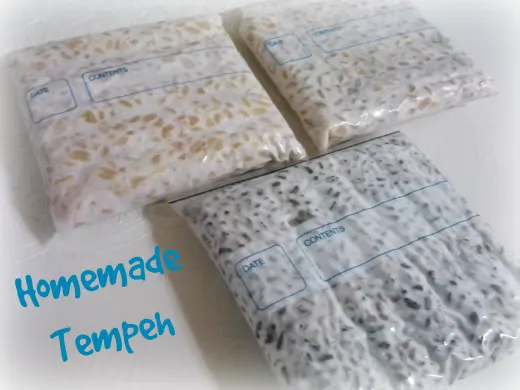
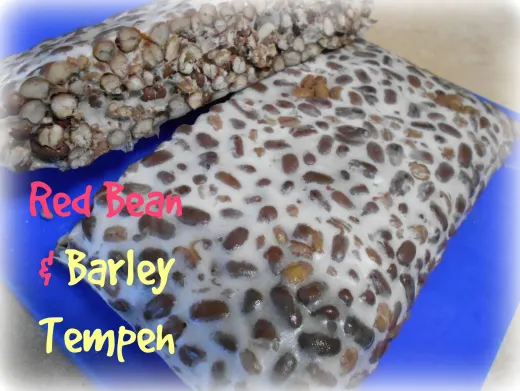
Commercially, you might not be able to find tempeh made from other types of beans since soybean tempeh is the most common in the market. It can also be made, however, with other legumes, such as chickpeas, adzuki beans, black beans, barley, and mung beans.
These beans can be made into tempeh by following the instructions above and placing them in Ziploc bags for fermenting. Always remember to pierce holes in the bags before putting them in the incubator. The bags can be stored in the freezer for many months, and you’ll never run out of tempeh again!

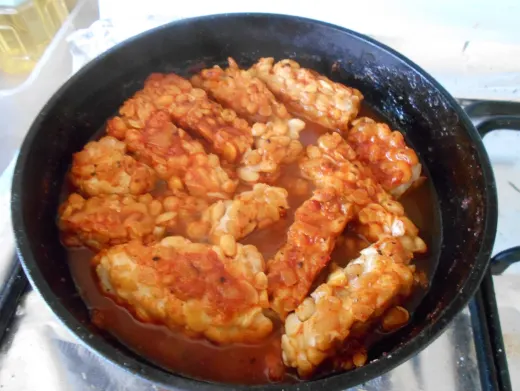
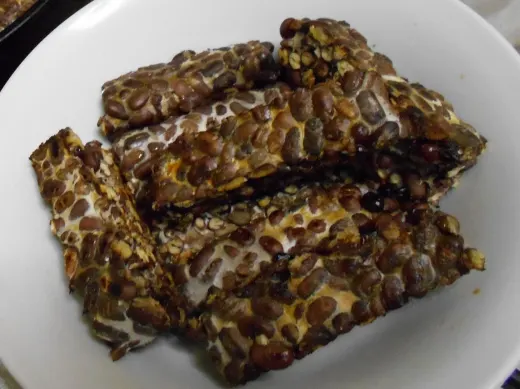
Tempeh is indeed a very versatile ingredient for cooking!

| Nutrition Facts | |
|---|---|
| Serving size: 100g | |
| Calories | 193 |
| Calories from Fat | 99 |
| % Daily Value * | |
| Fat 11 g | 17% |
| Saturated fat 2 g | 10% |
| Unsaturated fat 4 g | |
| Carbohydrates 9 g | 3% |
| Sugar 9 g | |
| Protein 19 g | 38% |
| Cholesterol 9 mg | 3% |
| Sodium 9 mg | |
| * The Percent Daily Values are based on a 2,000 calorie diet, so your values may change depending on your calorie needs. The values here may not be 100% accurate because the recipes have not been professionally evaluated nor have they been evaluated by the U.S. FDA. | |
How to Make Soft and Fluffy Sweet Buns
How to Use a Thermal Cooker (Plus 9 Recipes)
Awesome Christmas Spritz Cookies: Easy Biscuit Recipe
How to Make Eco-Friendly Enzymatic Cleaner and Citrus Insect Spray
Crispy Pork Rind Cracklings – How to Make Pork Chicharrón
How to Make White Radish Cake Recipes: Hong Kong-Style Dim Sum and Singapore Hawker Style
Learn How to Make Curry Puffs: Deep-Fried Pastries With Curried Meat and Potatoes
How to Make Salted Duck or Chicken Eggs
© 2015 lady rain
About the author

Lady Rain lives in Australia and enjoys writing about travels, paper quilling crafts and historical events. She wrote on HubPages for 14 years.